Choosing The Perfect Mushroom Substrate

Mushrooms are fascinating organisms. They’re a part of the fungi kingdom, which is distinct from plants and animals.
One crucial aspect that helps mushrooms thrive is their substrate – the material on or in which an organism lives, grows, or obtains its nourishment. Just as plants need fertile soil to grow well, mushrooms require an appropriate substrate to flourish. The kind of substrate you choose can have a significant impact on your mushroom cultivation process; it affects not only growth but also yield and quality.
Here, we’ll delve deep into understanding what a mushroom substrate is and why it’s so important. We’ll guide you through the process of preparing your own mushroom substrates at home while ensuring they’re nutrient-rich for optimal growth.
Understanding the Types of Mushroom Substrate
Manure-based mushroom substrate is a popular choice among cultivators due to its rich nutrient content and optimal moisture retention qualities; however, it’s not your only option.
We’ll explore other substrate alternatives that are equally effective in providing an ideal environment for fungi to grow and thrive.
Manure-based mushroom substrate
In our quest for the perfect mushroom substrate, we’ve found that manure-based substrates offer some unique benefits.
They’re rich in nutrients, providing an excellent food source for fungi and promoting robust, healthy growth.
Additionally, since mushrooms in the wild often grow on or near dung, using a manure-based substrate can provide a more natural environment for them to thrive in.
Benefits of Using Manure as Substrate
You’ll find that utilizing manure as a substrate for growing mushrooms offers several benefits, enhancing both the growth rate and yield of your crop. This is because:
– Manure is rich in nutrients: As a mushroom substrate, manure packs an impressive nutrient profile that includes nitrogen, carbohydrates, and minerals essential for mushroom growth. These nutrients act as food sources for the mushrooms, resulting in robust fruiting bodies.
– Manure helps maintain optimal moisture content: The physical structure of manure allows it to retain water efficiently. An adequate moisture content is vital for successful mushroom cultivation as it supports mycelium development and contributes significantly to the overall weight of edible mushrooms.
– Manure supports a wide range of mushroom species: Due to its broad nutrient spectrum and excellent moisture-retention properties, various types of edible mushrooms thrive in manure-based substrates.
By understanding these benefits associated with using manure as a mushroom substrate, we’re better equipped to maximize our yields and grow healthy crops consistently.
Other Substrate Options
Next, let’s look into other substrate options that can be beneficial for mushroom cultivation.
We’ve got agricultural waste, which is abundant and often overlooked, yet it can provide a rich growing medium for various mushroom species.
Sawdust and straw are other excellent choices due to their fibrous nature, which allows mycelium to colonize easily.
Coffee grounds offer an intriguing alternative as they’re packed with nutrients fungi thrive on – they’re readily available and make an eco-friendly choice.
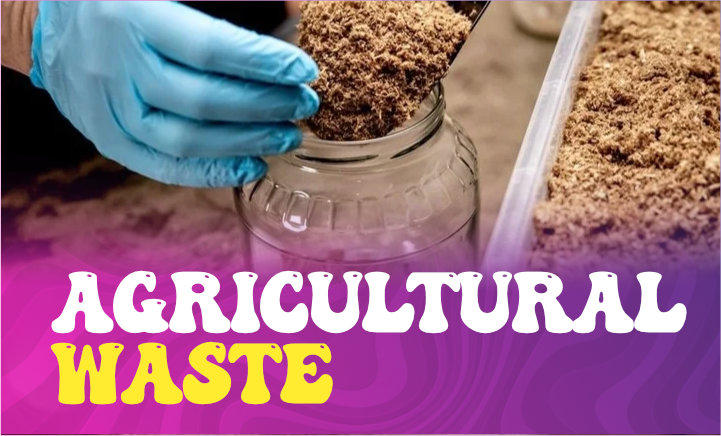
Agricultural Waste
Surprisingly, agricultural waste serves as an excellent mushroom substrate due to its nutrient-rich composition. Its natural abundance and affordability make it a viable option for many types of mushrooms. As mushroom growers, we’ve discovered that different forms of agricultural waste can be used to create a perfect substrate mix.
Straw, particularly wheat straw, is rich in lignin and cellulose; when these components are broken down during the mushroom growing process, they provide essential nutrients for fungi development.
Poultry manure gives a nitrogen boost that significantly enhances mycelium growth; however, due to its high nutrient content, it must be properly sterilized or pasteurized before use.
Corn cobs and rice hulls are other substrates that have shown great potential; their structure promotes air circulation while retaining moisture content.
Each type requires varying degrees of preparation before being utilized as a substrate – usually involving some form of sterilization or pasteurization to kill off unwanted organisms.
Agricultural waste offers an effective solution and contributes towards sustainable farming practices by recycling otherwise discarded material into valuable resources for mushroom cultivation.
Sawdust
In addition to agricultural waste, sawdust also serves as a highly beneficial medium for cultivating fungi, thanks to its rich composition and impressive water retention capabilities.
Particularly, hardwood sawdust is favored as a type of substrate due to its slow decomposing nature, which offers sustained nutrition for the mushroom spawn during the growth period.
The process involves inoculating the sawdust with the desired species of mushrooms – typically oyster mushrooms or shiitake mushrooms are preferred, given their adaptability and productivity in different substrates.
Straw
You’ll find that straw is another fantastic resource for growing fungi, especially for species like oyster mushrooms. Specifically, wheat straw serves as a prime bulk substrate due to its accessible structure, which allows the mushroom culture to easily penetrate and colonize.
It’s worth noting that other varieties, such as button mushrooms (Agaricus), Maitake, and Turkey Tail, also thrive in this medium, given its nutrient-rich composition.
When preparing wheat straw as a substrate, make sure it’s chopped into small pieces before pasteurization—a crucial step that kills off any potential competitors. Once cooled, introduce the spawn: a mycelium-infused grain which initiates the growth of your desired fungi.
Coffee Grounds
Ever thought about giving those used coffee grounds a second life? Well, they can be an excellent substrate for growing mushrooms.
Coffee grounds are already pasteurized due to the brewing process, making them sterile and more than ready for mycelium to colonize. They’re rich in nitrogen, a nutrient that’s vital for the growth of healthy and high-yielding mushrooms.
The grain spawn you’ve been nurturing will find it easy to penetrate this substrate and spread its mycelium network. What’s even better is that when mixed with coco coir, coffee grounds maintain the right moisture balance needed for successful fruiting.
Just remember – while coffee grounds make a great substrate on their own or mixed with others like straw or coco coir, finding the right substrate always depends on the mushroom species you’re cultivating.
Preparing Mushroom Substrate
Now that we’ve understood and chosen the perfect mushroom substrate, let’s move on to the steps of preparing it.
This involves two significant processes – sterilizing and pasteurizing the mushroom substrate.
By properly doing these steps, we can create an ideal environment fo mushrooms to thrive while eliminating potential contaminants that could hinder their growth.
Sterilizing Mushroom Substrate
When it comes to mushroom cultivation, It’s not just about picking the right substrate, it’s also about treating it properly to optimize its potential as a nutrient-rich base for our mushrooms.
Methods for Sterilizing Mushroom Subtrate
Before you can start growing your own mushrooms, you’ll need to sterilize the substrate to provide a clean environment for the fungi. Sterilizing your mushroom substrate is crucial because it eliminates any competing microorganisms that could hinder your mushrooms’ growth.
There are several methods to sterilize your substrate, each with its own benefits and drawbacks. Here’s a quick rundown:
Monotub method: This involves filling a monotub (a large, clear plastic tub) with your chosen substrate, such as brown rice or wood chips, then heating it in an oven or on a stovetop until it reaches the right temperature for sterilization.
Pressure cooker method: This is one of the most effective ways of sterilizing substrates. You simply place the substrate into jars and put these into a pressure cooker. The high heat and pressure will kill off any unwanted organisms.
Autoclave method: Much like a pressure cooker, an autoclave uses high-pressure steam to sterilize materials. Though this method is more commonly used in labs due to its efficiency and consistency, home growers can also use smaller versions designed for domestic use.
Hot water bath method: A simple yet effective technique where you submerge bags of mushroom substrate in boiling hot water for an extended period.
Pasteurizing Mushroom Substrate
You might wonder what the difference is between sterilizing and pasteurizing mushroom substrates. While sterilization destroys all organisms, pasteurization only kills potential pathogens while preserving beneficial microbes.
We’ll be taking you step-by-step through the process involved in pasteurizing your mushroom substrate to ensure successful and healthy fungal growth.
Difference between Sterilization and Pasteurization
What’s the real difference between sterilization and pasteurization when preparing your mushroom substrate?
Well, both processes aim to eliminate unwanted organisms that could compete with our mushroom spores.
Sterilization is a more intense process that uses higher temperatures and pressures to kill all living organisms in the substrate, including bacterial spores. This method is typically used for creating liquid cultures or spawn bags since it eliminates any potential competitors, allowing the fungus to thrive.
On the other hand, pasteurization uses lower temperatures which kills most harmful bacteria but leaves beneficial ones. It’s commonly used for bulk substrates like straw or compost, where certain microbes actually help with mushroom growth.
By adding amendments such as gypsum or vermiculite, we can further optimize the substrate’s texture and water retention capabilities. Gypsum provides calcium and sulfur, beneficial nutrients for fungi, while vermiculite aids in maintaining humidity levels within the substrate — an essential factor for fruiting mushrooms.
Steps in Pasteurizing Mushroom Substrate
Having discussed the difference between sterilization and pasteurization, it’s clear that both methods have their unique benefits in mushroom cultivation.
Now, let’s dive deeper into the process of pasteurizing mushroom substrate– a crucial step for cultivating many types of gourmet mushrooms like lion’s mane and reishi.
To begin with, you’ll need to prepare your substrate mix; a common formula is the ‘masters mix’, which consists of 50% hardwood sawdust and 50% soy hulls. Soy hulls—also known as soybean hulls—are an excellent additive because they provide essential nutrients for fungal growth.
Once your substrate mixture is ready, the pasteurizing process can begin. This involves submerging the mix in water heated to about 160-180°F (70-80°C) for an hour or so, effectively killing off potential contaminants while preserving beneficial bacteria.
Remember, pasteurizing mushroom substrate correctly is key to achieving a successful yield and promoting healthy mycelium growth in your fungi cultures.
Enhancing Mushroom Substrate
We’ll now discuss the benefits and methods of adding fertilizer to your mushroom substrate for optimal growth and using various nutrient-rich supplements.
These techniques can boost mycelium colonization and eventually lead to a more abundant flush of mushrooms.
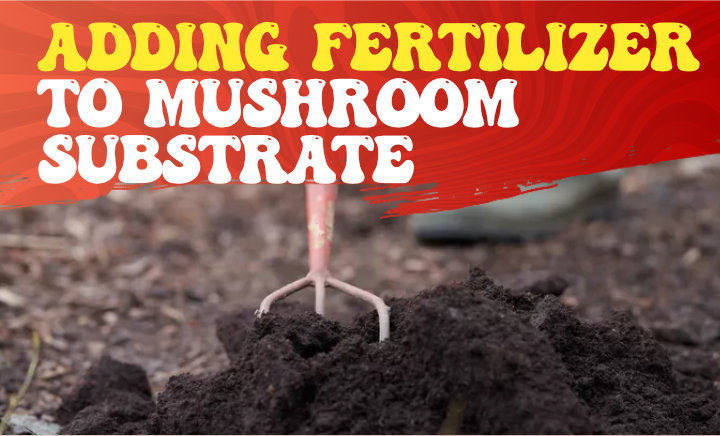
Adding Fertilizer to Mushroom Substrate
Sprinkling a bit of fertilizer into your mushroom substrate can give your fungi the extra nutrients they need, like envisioning a chef adding that final pinch of seasoning to perfect their dish.
Some mushrooms thrive on organic materials, and adding fertilizers can stimulate growth and enhance the flushes.
The key is to maintain a balance while introducing any new elements into your substrate mix. Overdoing it could lead to an environment too rich for the fungi, leading to unwanted bacterial growth.
You might want to consider oat husks as one of the components for your blend; not only do they offer beneficial microbes, but also add structure to the substrate.
When we talk about fertilizers in a mushroom-growing context, we’re typically looking at nitrogen-rich supplements such as chicken or horse manure or even commercial slow-release granules. Remember, some species are particularly sensitive to excessive nitrogen, so you must be cautious with how much you introduce.
In addition, always ensure that any animal-based amendments have been properly composted before use – this will kill off potential pathogens and make it safe for your mushrooms’ consumption.
After all, our aim here isn’t just prolific fruiting but also maintaining healthy mycelium, which will yield multiple flushes over time.
It’s all about creating that perfect environment where your mushrooms can flourish and produce bountiful harvests!
Using Substrate Supplements
You’re on the right track by considering substrate supplements to boost your fungi’s growth and production. Substrate supplements are a great way to provide additional nutrients that can enhance mushroom yield and quality.
They can be added during the preparation of the substrate or after colonization, depending on their composition and purpose. These supplements often contain a mix of nutrients, including nitrogen, phosphorus, potassium, and other trace elements that mushrooms need for optimal growth.
When choosing a supplement for your mushroom substrate, there are three key factors you should consider:
- Nutrient Composition: The nutrient composition of the supplement is crucial as different species of mushrooms have varying nutritional requirements. For instance, some species thrive with higher nitrogen levels, while others may require more phosphorus.
- Compatibility: Ensure that the supplement is compatible with your chosen substrate material. Some supplements may alter pH levels or moisture content which could negatively impact certain substrates.
- Application Method: Consider how easy it is to apply the supplement to your substrate. Some are mixed in during preparation, while others can be sprinkled on top after colonization.
Remember, using substrate supplements isn’t just about boosting yields – it’s also about improving overall mushroom health and quality!
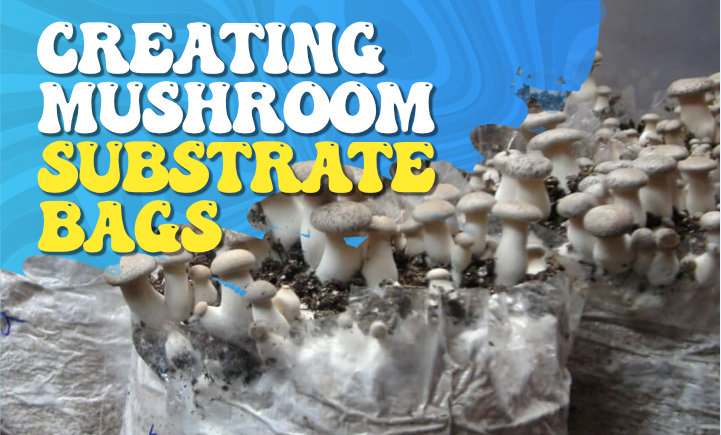
Creating Mushroom Substrate Bags
In cultivating your own mushrooms, one of the first steps you’ll need to take is creating mushroom substrate bags. These bags serve as the growing medium for the mushrooms, providing them with the necessary nutrients and conditions to thrive.
Steps for Making Mushroom Substrate Bags
Imagine the scent of fresh earth as you’re carefully filling bags with your homemade mushroom substrate, an essential step in growing bountiful and healthy mushrooms. Mushroom substrate can be made using a variety of materials, and the key is to create a nutrient-rich environment that will promote mushroom growth.
Different mushrooms prefer different substrates, so it’s vital to research your chosen mushroom species’ specific needs when preparing your substrate.
Now let’s get into the gritty details of making the perfect spawn bag. Begin by mixing your chosen material (say sawdust) with water until it holds moisture but isn’t dripping wet – achieving the right moisture content is crucial for successful colonization by mycelium (the vegetative part of fungi).
Place this mixture into a spawn bag and seal it tightly before proceeding with sterilization – this is done either via pressure cooking or autoclaving to kill any potential contaminants that could hinder mushroom growth. Once cooled, these sterilized bags are then inoculated with grain spawn or liquid culture under sterile conditions and left to incubate at appropriate temperatures until fully colonized.
And voila! You’ve successfully created a conducive environment for your mushrooms to thrive!
Procedure for Filling and Sealing Bags
Now, you’re ready to dive into filling and sealing the bags – a critical step that can make or break your entire mushroom cultivation process. Let’s start with choosing the right substrate. The type of substrate you choose largely dictates the success of your mushroom-growing operation.
Once you’ve selected an appropriate mushroom-growing substrate for your unique needs, it’s time to fill those bags! You want to pack the substrate mix firmly but not too tightly; this ensures good mycelium growth without suffocating it. After filling each bag approximately two-thirds full with your chosen mixture (this allows enough room for expansion as mycelium colonizes), it’s time to seal them up. A heat sealer works excellently for this purpose – just ensure a tight seal without any leaks.
Best Practices for Mushroom Substrate
You’ll find that choosing the right mushroom substrate can be quite an exciting adventure in your mushroom cultivation journey, as it significantly impacts the overall growth and yield of your fungi friends. It’s not just about picking any material; it’s more about selecting a bulk substrate that provides the essential nutrients for the mushrooms to thrive.
By understanding what each potential substrate offers, we can make informed decisions tailored to our specific mushroom species.
– Wheat Straw: This makes a great choice if you’re looking for a cheap, readily available option. However, remember that wheat straw may need pasteurization before use to kill off any competitive organisms.
– Hardwood Sawdust: If you’re cultivating wood-loving species like shiitake or oyster mushrooms, hardwood sawdust is an excellent choice. This will require sterilization with a pressure cooker to ensure optimal growth conditions.
– Coco Coir/Vermiculite Mix: A mix of coco coir and vermiculite serves as an ideal casing layer due to its high water retention ability. But beware! Too much moisture could lead to contamination issues.
Plenty of factors are at play here – from sourcing your materials and preparing them through pasteurization or sterilization down to balancing nutrient content and moisture levels within the bulk substrate itself. As with an endeavor, experimentation is key; don’t be afraid to tweak ratios and try new things until you’ve found what works best for your particular strain of mushrooms. Remembering all this advice will help us navigate this vital part of our fungal cultivation journey efficiently and fruitfully without unnecessary trial-and-error mishaps!
Reusing Mushroom Substrate
Once your first batch of fungi has finished fruiting, don’t toss out that used bulk material! It might seem like it’s spent and useless, but in reality, reusing mushroom substrate can be a cost-effective and environmentally friendly option.
The mycelium that remains in the substrate after the initial harvest can continue to provide nutrients for future crops of mushrooms. Additionally, reusing mushroom substrate reduces waste and makes use of resources that would otherwise end up in landfill.
When we reuse our mushroom substrate, it’s important to keep a few things in mind. The primary concern for many mushroom growers is ensuring that the reused substrate still contains enough nutrient content to support more growth. One way we may do this is by adding additional nutrients, such as brown rice or other grains, into our spent substrate. This not only replenishes lost nutrients but also provides new material for the mycelium to colonize, creating a fresh spawn for growing edible mushrooms.
To ensure success with reusing mushroom substrates, careful monitoring is crucial. Watch out for any signs of contamination or disease which could negatively impact your next crop of mushrooms. Remember too, that while reusing substrates can save you money and reduce waste, it may not always produce the same yield as fresh materials due to the depletion of certain nutrients over time.
Despite these challenges, though, with proper care and attention, reusing mushroom substrates can be an effective strategy for sustainable cultivation practices.
Final Thoughts
When it comes down to it, selecting the ideal substrate involves understanding what conditions your specific variety of mushroom prefers and creating an environment where they can flourish. Whether you’re preparing grain spawn or mixing coffee grounds with wood chips, remember that each step, from preparation through inoculation, is crucial in determining how fruitful your cultivation efforts will be.
No matter what path you choose, always remain attentive throughout each stage – from selecting high-quality ingredients for your substrate mix all the way through post-harvest care – because there’s no one-size-fits-all answer here; every cultivator has their unique journey towards achieving ‘mushroom success.’
Frequently Asked Questions
What can be used as mushroom substrate?
Common materials used as mushroom substrate include straw, sawdust, wood chips, coffee grounds, and agricultural waste such as corn cobs or cottonseed hulls. Different mushroom species have specific substrate preferences.
What is the cheapest way to make mushroom substrate?
Using agricultural waste materials such as straw or sawdust can be a cost-effective option for making mushroom substrate. These materials are often readily available and relatively inexpensive.
What are the common substrates for mushroom cultivation?
Common substrates for mushroom cultivation include straw, sawdust, wood chips, coffee grounds, and supplemented substrates like grain or bran. The choice of substrate depends on the type of mushroom being cultivated.
How do you make a simple mushroom substrate?
To make a simple mushroom substrate, you can mix materials like sawdust or straw with water and sterilize it to remove competing organisms. Depending on the mushroom species, you may also need to add supplements like grain or bran to enhance nutrient content.
Can you use oatmeal as a mushroom substrate?
While oatmeal may seem like a viable option, it is not typically used as a primary substrate for mushroom cultivation. Oatmeal lacks the necessary nutrients and structural components required for successful mushroom growth.
How do you use coffee grounds as a mushroom substrate?
To use coffee grounds as mushroom substrates, mix them with other materials like spent brewer’s grain or sawdust. The mixture should be pasteurized or sterilized before inoculating with mushroom spawn. Coffee grounds provide nutrients and can enhance mushroom growth.
Can you make your own mushroom substrate?
Yes, you can make your own mushroom substrate. By combining appropriate materials like sawdust, straw, or coffee grounds with water and supplements, you can create a suitable substrate. Proper sterilization or pasteurization is crucial to ensure a favorable environment for mushroom cultivation.
